
1
Set the scene
Start with context
Fill the frame
2–3 ft for close-ups; keep ladders, cords and workers fully in view.
Workplace hazard documentation is the record you keep of a hazard: what it is, where it is, how severe it is, when you saw it, and what was done to fix it. A photo is the strongest single piece of that record — it shows the actual condition instead of describing it from memory. OSHA Scan turns an uploaded jobsite photo into a dated, scored hazard report: each visible hazard, the OSHA standard it may relate to, why it matters, and a suggested corrective action, so the noticing and the write-up happen in one step. It is free to try with no account (you may be asked for the free phone Access Pass). It is a second set of eyes and a documentation aid — not a compliance verdict, and not a substitute for a competent person's walk.
Free · No account needed to scan · You may be asked for the free phone Access Pass
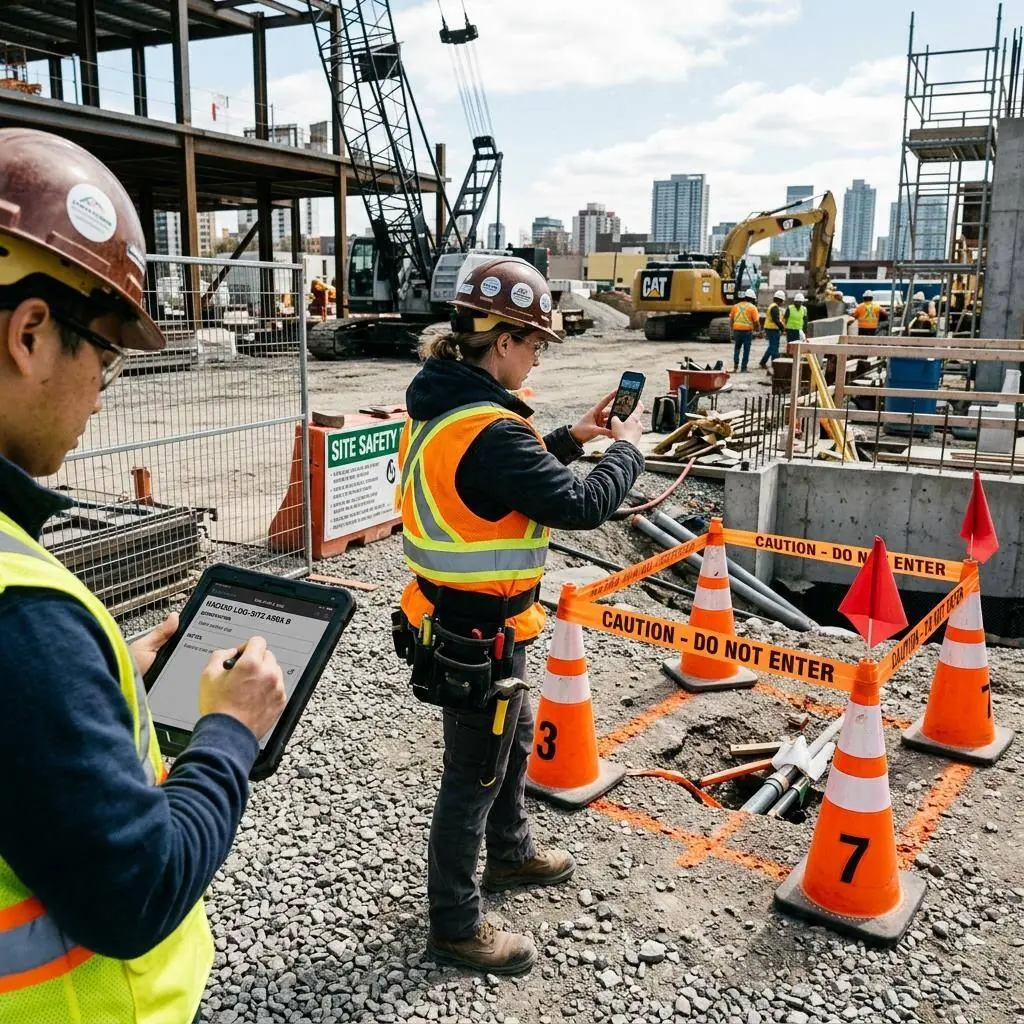
The classic hazard record is a line in a logbook: 'blocked exit, back dock, fixed.' It satisfies the checkbox and proves almost nothing. Six months later, when a near-miss or a claim reopens the question, the line cannot show how bad the blockage was, whether it was one pallet or ten, or what the corridor looked like the day it was flagged. Text-only documentation degrades the moment the memory fades — which is exactly when it gets asked for.
A photo is the fix for that. It fixes the condition in time: this aisle, this day, this severity. Photo-first documentation turns 'I think it was cleared' into a before image and an after image with dates attached. OSHA Scan builds the write-up around that photo — you upload the frame, and each visible hazard comes back named, scored, and tied to the OSHA standard it may relate to, with a suggested corrective action. The evidence and the analysis land together instead of in two different systems a week apart.
The workflow is built for how documentation actually gets used: every scan saves as a dated, scored report; accepted findings become corrective actions with an owner and a due date; a re-scan after the fix produces the paired after image; and the whole record exports to PDF or Excel for the binder, the client, or the file your program already keeps. Notice, record, assign, close — with the photo doing the work that a sentence never could.
It helps to be precise, because 'documentation requirements' gets used loosely. The recordkeeping rule with hard retention teeth is 29 CFR 1904 — the OSHA 300 Log, 301 incident reports, and 300A summary. That rule covers work-related injuries and illnesses that meet the recording criteria, and it requires you to keep those records for five years following the year they cover. It is about outcomes that already happened, not about photographs of hazards you spotted and fixed. There is no general OSHA rule that says you must photograph every hazard or keep those photos for a set number of years.
Other standards do carry their own record duties — exposure and medical records under 29 CFR 1910.1020 have long retention periods, and specific programs (lockout/tagout, respiratory protection, process safety) require written procedures, inspections, or certifications. The takeaway is not that hazard photos are mandated; it is that when a recordable injury or an exposure question arises, the contemporaneous record of the hazard and its abatement is what turns a good-faith claim into a documented one. That is where voluntary photo documentation earns its keep.
OSHA's enforcement, and most incident investigations, hinge on two questions: did the employer know about the hazard, and did they correct it. Dated, photographed hazard records answer both. A before image with a timestamped report and an after image showing the fix is the cleanest way to demonstrate that a condition was identified and abated — the kind of good-faith documentation that matters during an inspection, a workers' comp dispute, or an insurance review. It is evidence of a working safety process, not proof of perfection.
The second payoff is training. Real photos of real hazards from your own site beat stock clip art in every toolbox talk. A scored report showing exactly which walkway was blocked, which panel was open, or which guard was missing gives a crew something concrete to recognize tomorrow. Building a small library of dated, annotated hazard photos — the good catches and the corrected conditions — turns your documentation into a teaching tool instead of a filing chore.
A photo documents what a camera captures, and AI reads only that frame. It cannot verify a date or a location by itself — a browser web app has no reliable GPS or timestamp guarantee, so the date and place still belong in your own record-keeping fields or notes. It cannot measure an atmosphere, confirm a circuit is dead, or prove a guard functions; it sees a moment, not a system. And a beautifully documented hazard that never gets corrected documents a failure, not a fix.
So treat the scan as the fast first pass: photograph the condition, get the drafted, standard-referenced write-up, add the location and any context the frame does not show, verify the findings on site, and — most important — close the corrective action and re-shoot the fix. Try the loop on a photo of your own site below. The demo scan is free.
Run through these steps before crews start — each one covers a visible gap the AI can help you catch.
Before you clear or fix anything, take a photo that shows the hazard and enough of its surroundings for context — the blocked walkway and the exit beyond it, not just a tight crop. This as-found image is the foundation of the record.
Upload the frame. The AI returns each visible hazard with a risk level, the OSHA standard it may relate to, why it matters, and a suggested corrective action, plus a 0-100 area score — the description and analysis of your hazard record, drafted.
A browser app cannot reliably tag time or place, so record the date, building, and area in your notes or the report fields, and add anything the photo cannot show. Verify each finding on site and dismiss any that do not apply.
Turn each verified hazard into a corrective action with an owner and a due date, then keep it visible until it is done. Documentation is only useful when the loop closes — an unactioned hazard record works against you.
After the correction, re-photograph the area for the after image and re-scan to move the score. Export the dated before-and-after report to PDF or Excel and file it where your program keeps records so it can be retrieved later.
One frame of the condition — this is what comes back as a dated, structured hazard record.
Blocked walkways, open panels, missing guards, PPE gaps, storage and housekeeping problems — each visible hazard identified and described from the frame.
Each finding gets a risk level and the OSHA standard it may relate to, phrased as a possible reference — never a compliance verdict.
Findings are pinned to where they sit in the photo, so the record shows exactly which corner of the frame the hazard is in.
The report saves with a date and a 0-100 area score, giving you a comparable, filable record instead of a loose photo in a phone roll.
Scan a photo like the one above and this is the report you get — score, findings, OSHA references, and fixes. It is an illustrative example, clearly marked — not live scan data.
Compliance score
68
Lower means more potential hazards found
Score uses visible confirmed findings only. Not a safety certification.
3 confirmed · 0 need review · 0 positive
1Pallets and stock blocking a marked walkway and the path to an exit
Possibly related to exit route obstruction (29 CFR 1910.37(a)(3))
Observed condition: A walkway that doubles as an egress path has to stay clear — during an evacuation, stock in the aisle turns a 20-second exit into a scramble, and it is the finding an inspector notices first.
Corrective action: Clear the aisle to the marked width, restripe if the line is worn, and photograph the cleared corridor as the after image on the same report.
High confidence
2Cardboard and shrink-wrap debris on the floor in the work path
Possibly related to housekeeping and walking-working surfaces (29 CFR 1910.22(a))
Observed condition: Loose wrap underfoot is a slip-and-trip source and the easiest condition on this page to fix — documenting it dated makes the difference if someone goes down here next week.
Corrective action: Sweep the path and place a covered bin at the pack station; add a photographed end-of-shift housekeeping check to the record.
High confidence
3Upper rack level loaded past the pallet edge with no visible load-rating sign
Possibly related to material storage and rack safety (29 CFR 1910.176(b))
Observed condition: Overhanging loads on a high rack are a struck-by hazard for anyone in the aisle, and an unposted capacity makes it impossible to prove the rack is loaded within its limit.
Corrective action: Pull the overhanging load back within the pallet footprint, post the rack's rated capacity, and note the correction on the report.
Medium confidenceNot fully clear from the photo — verify on site.
Upload a photo like the one above and get a compliance score and hazard count. No account needed to scan, though you may be asked for the free phone Access Pass — create a free account to unlock the full report.
Use the real site or facility name. If you save the scan after signup, it becomes the report name.
Three angles, one deeper scan
Only the wide shot is required — every extra angle gives the AI more places to look.
Required: Set the scene — one wide shot lets the AI sweep the whole area at once
Stand at the entry point and capture corner to corner: floors, ladders, scaffolds, and everyone at work
Drop a job-site photo or walkthrough video
Click to upload, drag & drop, or snap a photo on site. Photos scan free with no signup and no card — you may be asked for the free phone Access Pass. Video walkthroughs (up to 3 min) run on a free account.
Small habits, sharper scans
Set the scene
Start with context
Fill the frame
2–3 ft for close-ups; keep ladders, cords and workers fully in view.
Capture clearly
Make the frame usable
Light it right
Keep the sun or lights behind you — glare and shadows hide hazards.
Tap to focus
Tap the hazard on screen and hold still one second — blur can't be flagged.
Choose the useful view
Give the AI room to understand
Go landscape
Turn your phone sideways — a wider frame catches more of the scene.
Only upload photos you have permission to use, and avoid images showing personal, customer, or confidential information. Demo photos and results are held privately for up to 48 hours so you can save them to a free account; unclaimed photos are deleted automatically. Results are an AI-assisted preliminary review, not an official OSHA determination.
New: Video walkthrough scans
Record up to 3 minutes of your site — the AI extracts frames and categorizes findings with exact timestamps. Free account required.
Get the best results
Wide shot first
Stand at the entrance and photograph the entire work area so AI sees the full context
Hazard areas
Photograph elevated surfaces, equipment, electrical panels, and anywhere workers are active
Close-ups last
Move in close on anything damaged, missing, or that looks risky — the AI catches more detail
What a defensible hazard record contains, and how to build it from a photo. The first four points are free — create a free account to unlock the full checklist and document your own photos.
Photograph the condition, not just a close-up
Frame the hazard and enough surroundings to show context — the blocked aisle and the exit it leads to, not a tight crop that loses the story.
Capture it before you touch it
Shoot the as-found state first. The before image is the half of the record that proves the hazard existed; you cannot recreate it after the fix.
Record the date and the exact location
A browser app cannot guarantee a GPS tag or timestamp, so write the date, building, and area into your own notes or the report fields — the photo alone does not prove when or where.
Name the hazard and its severity
Say what it is and how bad it is. The scan drafts this — a named hazard with a risk level — so the record is searchable and sortable, not a vague 'issue on the dock.'
OSHA Scan reads a single photo. That makes it fast and easy for anyone on site — but it also means it has real limits. Here's an honest look at both.
Snap a photo of the job site, and the AI categorizes findings against OSHA standards.
Each finding includes consistent corrective actions and structured JHA outputs. Check items off as your crew resolves them.
Every inspection gets a deterministic 0-100 compliance score derived from hazard severity, so you can track sites at a glance.
A prioritization aid based on recorded findings—not a certification or a complete measure of site safety.
Generate detailed inspection reports and export data to Excel for record-keeping and stakeholders.
A qualified person must review AI-flagged items before making safety decisions. Do not replace required comprehensive safety walkthroughs with AI reports. Features, limits, and downloads depend on your account’s plan and permissions.
Illustrative AI-assisted workflows. Review the findings; they are not a compliance certification.
A scan is a fast first look, not the final word. Before treating this kind of area as safe, a competent person should still confirm:
At minimum: what the hazard is, where it is, how severe it is, the date it was observed, and what corrective action was taken and when. A photo of the as-found condition is the strongest single element because it shows the actual state instead of describing it. OSHA Scan drafts the description, severity, and a possible OSHA reference from your photo, and lets you attach an owner, a due date, and an after image.
No. There is no general OSHA rule requiring you to photograph hazards or keep hazard photos for a set time. The recordkeeping that OSHA does require is under 29 CFR 1904 — the 300 Log and related forms for work-related injuries and illnesses, kept for five years. That covers outcomes, not hazard photos. Photo documentation is a voluntary best practice that helps demonstrate you found and fixed conditions.
It depends on the record. OSHA 300/301/300A injury and illness records under 29 CFR 1904 must be kept for five years following the covered year. Employee exposure and medical records under 29 CFR 1910.1020 have much longer retention. Voluntary hazard photos have no mandated retention — but keeping them long enough to cover a potential claim or inspection is sensible. Confirm the specific rule that applies to your record type.
Not on its own. OSHA Scan is a browser web app and cannot guarantee a GPS location or a trustworthy timestamp on your image, so the date and place belong in your own report fields or notes. The photo shows the condition; you supply the context that makes it a dated, located record. Treat the scan as documentation support, not automated proof of time and place.
You upload a photo of the condition. A vision model reads the frame and returns each visible hazard — what it is, the OSHA standard it may relate to, why it matters, and a suggested corrective action — plus a 0-100 area score. The result saves as a dated report you can verify, assign as a corrective action, re-scan after the fix, and export to PDF or Excel.
Trying it is free with no account (you may be asked for the free phone Access Pass): upload a photo and see the score and hazard count. A free account unlocks the full findings with OSHA references, saved reports, corrective-action tracking, and export. It does not replace a competent person's walk — the AI is a second set of eyes on visible conditions, and the items it cannot see are listed for you to verify manually.
Reviewed by OSHA Scan Editorial
This content is produced by the OSHA Scan Editorial team and reviewed with AI assistance. It is general safety information, not legal or compliance advice. OSHA Scan is an independent tool and is not affiliated with, endorsed by, or certified by OSHA or the U.S. Department of Labor.
Free PDF checklist
33 critical checks across 7 categories — the same visible gaps the AI scanner looks for. Sent to your inbox as a free PDF.
More ways to see what an AI OSHA scan can do for your site.
The overview hub — how the scanner works and every job, site, and hazard it covers.
The photo-first hazard analysis workflow this documentation builds on.
How the AI reads a jobsite photo and scores the visible hazards.
Turn documented findings into dated, exportable reports.
Run a full photo inspection that feeds your hazard records.
What an inspector looks for — and what your records should show.
The complete hub of every hazard type and industry the scanner covers.
The form that records the details of each recordable work injury or illness.
OSHA's official rule for the records that carry mandatory retention — the 300 Log and related forms for work-related injuries and illnesses.
Official resource — osha.govSee a complete labelled example of everything a scan returns.
Start with one lifetime use per eligible scan type — no credit card. Build JHA-ready reports and catch changing conditions sooner.
Start your free trial